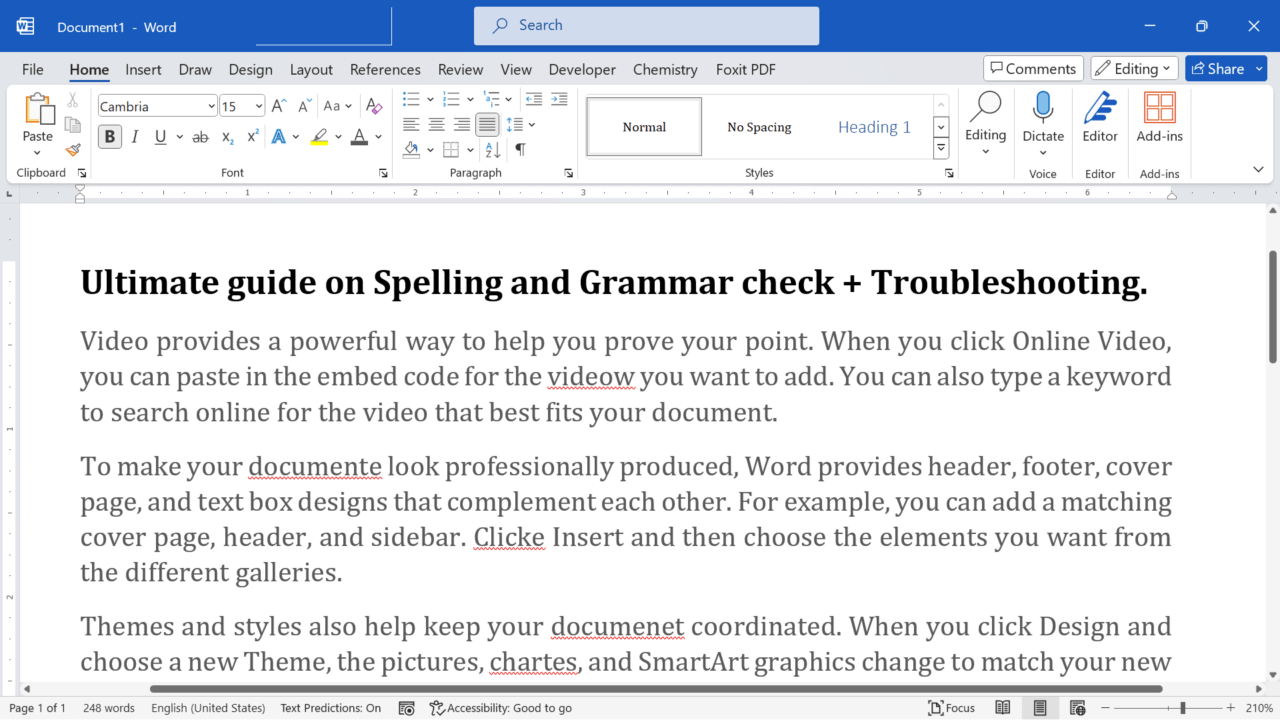
Microsoft Word can detect spelling mistakes, suggest grammar corrections, and help improve clarity as you write. In modern Microsoft 365 versions, these tools appear under Microsoft Editor. Use Review > Editor or the F7 shortcut to check the whole document. This guide explains both methods, useful shortcuts, proofreading settings, and what to do when specific words are not flagged.
Choose a proofreading method: use the Editor command on the ribbon or press F7. The sections below explain both options.
Troubleshooting: jump to the relevant checklist if Word misses some mistakes or stops checking entirely.
How to Check Spelling and Grammar in Word
1. Use Review > Editor (or Spelling & Grammar)
On many Word for Microsoft 365 installations, choose Review > Editor or Home > Editor. Older desktop versions may label the command Review > Spelling & Grammar. Choose spelling or grammar suggestions in the Editor pane, and review each proposed correction before accepting it.
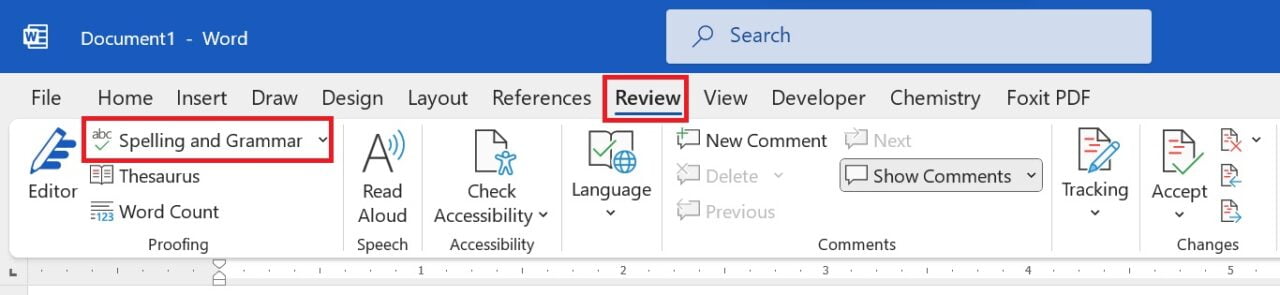
Word displays possible errors and suggestions. Depending on the version, you may see red underlines for spelling, other colored underlines for grammar and style, and different categories in Editor. The screenshot below shows one Microsoft 365 layout; other versions may differ.
2. F7: Check spelling and grammar with a shortcut
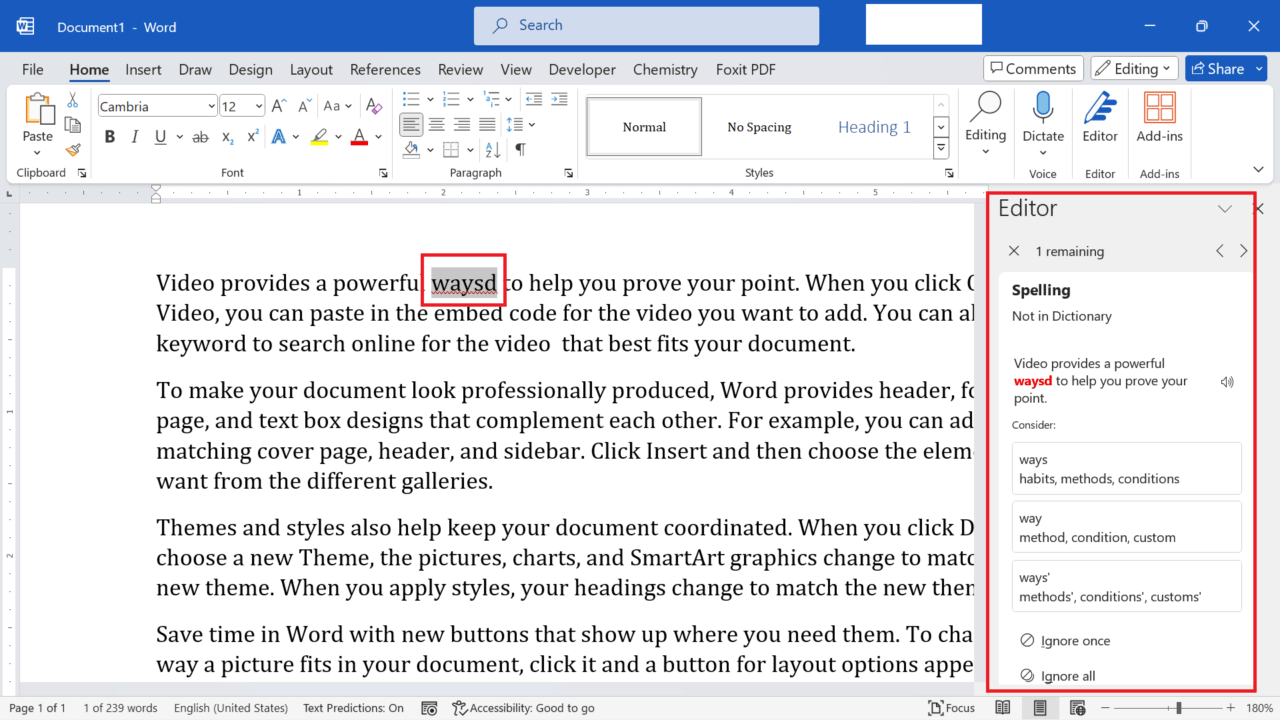
The F7 key starts a spelling and grammar check in Word desktop. On some laptops and Mac keyboards, you may need Fn + F7. Supported versions of Word for Mac can also open Editor with Option + Command + L. See Microsoft’s Word Editor instructions.
F7 opens the Editor task pane or the Spelling and Grammar dialog, depending on your Word version. You can review all issues or select text first to check a specific passage.
Another useful proofreading shortcut is:
Find the next spelling or grammar issue: use Alt + F7 in Word for Windows or Option + F7 on Mac, where supported and when automatic checking is enabled.
Troubleshooting: When Word does not flag a mistake
1. Some spelling or grammar errors are not flagged
If Word flags some mistakes but misses others, first check the proofing language, exceptions, and dictionary entries. A word can also be valid in one context but incorrect in another; automated grammar suggestions are not exhaustive.
a) Proofing options are hiding some mistakes
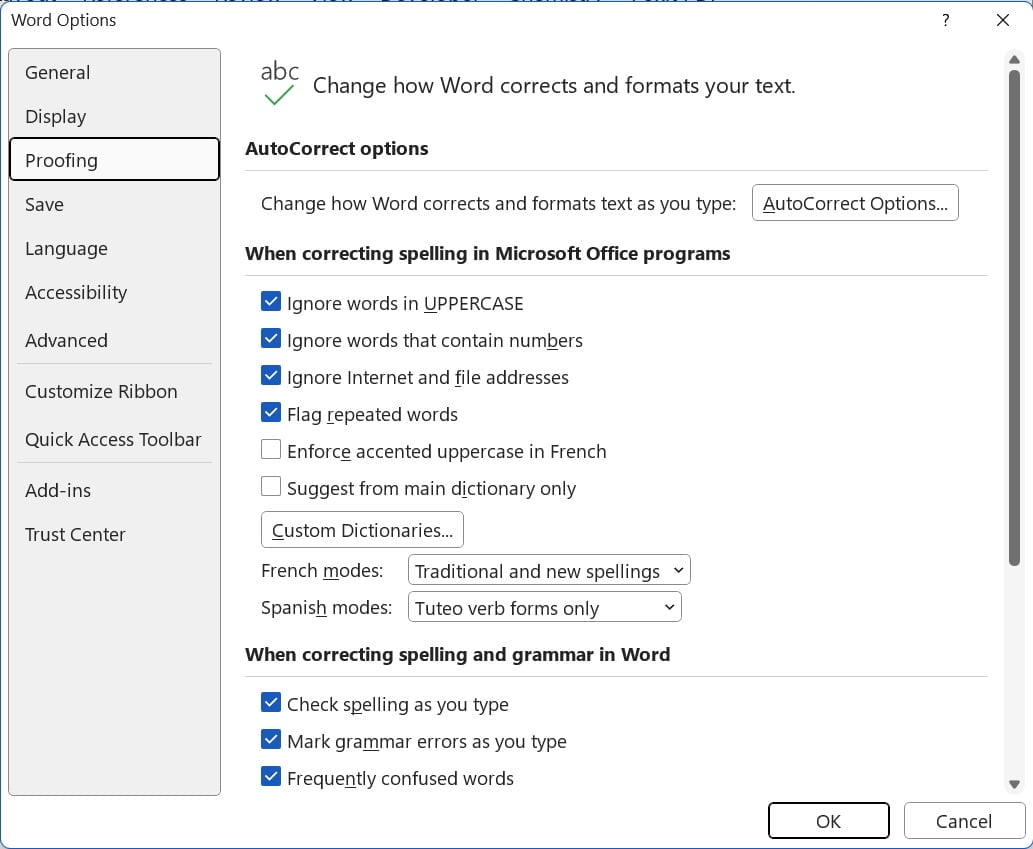
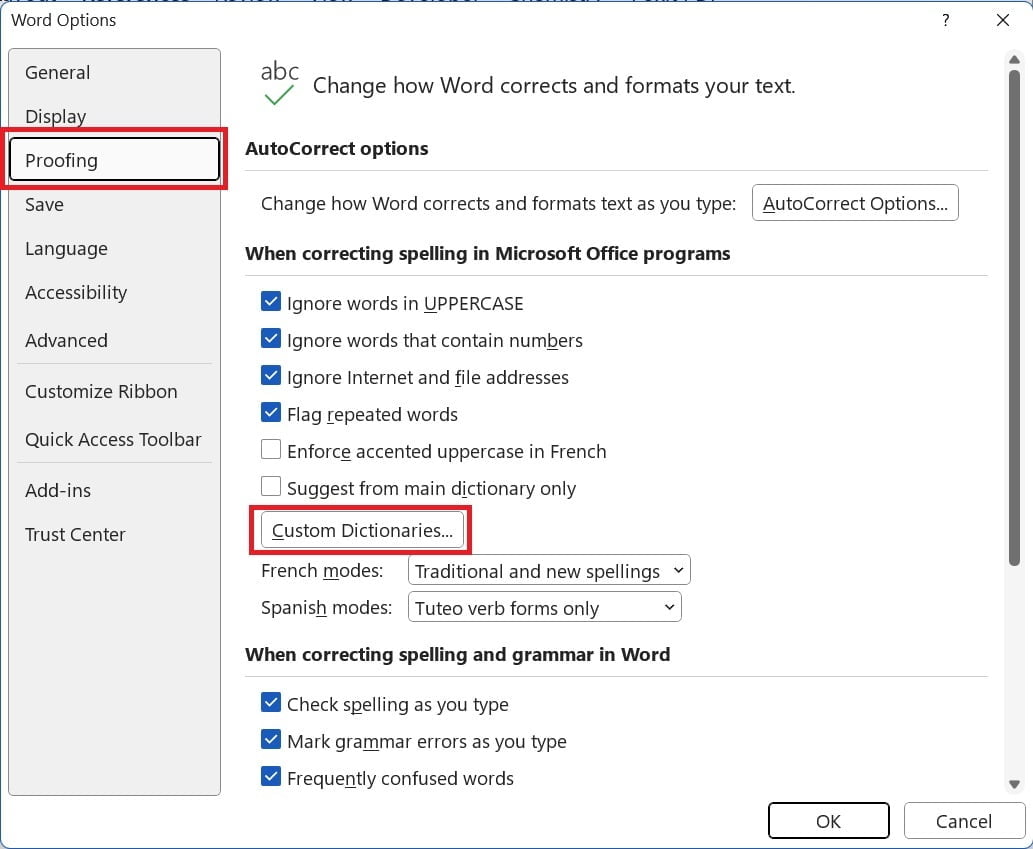
- Go to File > Options
- In the Word Options dialog box, click “Proofing” in the left-hand sidebar.
- Here, you can customize various aspects of the spell check feature, such as the language, auto-correction options, and grammar checking.

b) Incorrect spelling already saved in dictionary.
If a misspelling was accidentally added to a custom dictionary, Word may treat it as correct. In Word for Windows, review the custom dictionary and remove only the mistaken entry using these steps.
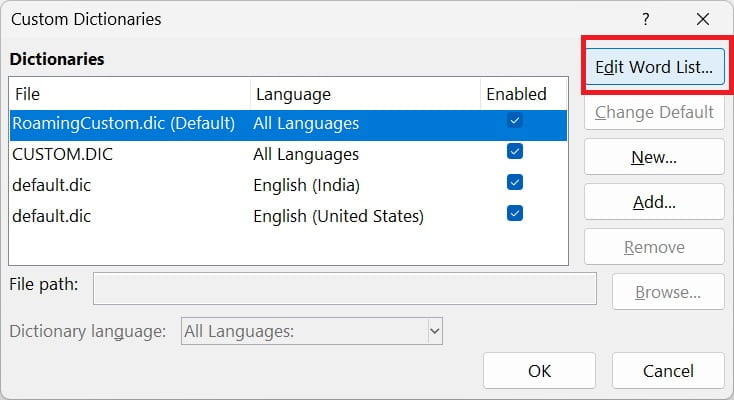
- Go to File > Options > Proofing and click Custom Dictionaries
- From the list of open dictionaries, select dictionary and click “Edit Word List“

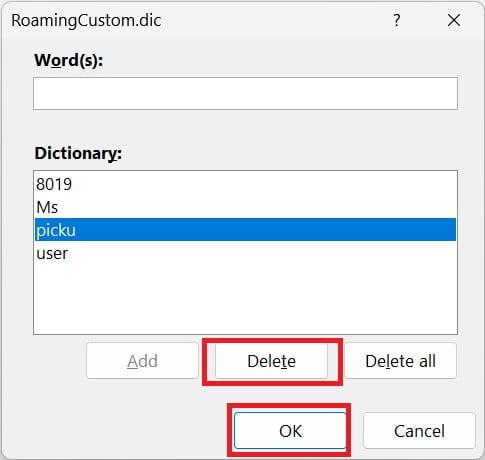
- From the word list, select the word (spelling that is incorrect) and click Delete

- Click Ok and close all other Windows.
After removing an entry, run the spelling check again. Word may flag the word if it is not recognized by another active dictionary; results also depend on the selected proofing language and document settings.
Spelling and grammar checking do not work at all
Spell check may fail entirely because of disabled automatic checking, an incorrect proofing language, a document-specific exception, or unavailable proofing tools. These causes are covered in detail here.
- Spelling and grammar check turned off: Turn on spelling check.
- Incorrect language selected: Choose the correct language
- Proofing tool not installed: Add proofing tool
- Document-specific issue: Check Review > Language > Set Proofing Language and the document’s proofing exceptions before copying content to a new document. Pasting may carry formatting and proofing settings with it.
For a complete checklist, see how to fix spell check in Word.
Review grammar and style with Microsoft Editor
After opening Editor, select a category such as Grammar, Clarity, or Conciseness if it is offered. You can accept, ignore, or inspect each suggestion. Refinements depend on your version of Word, language, and subscription, so not everyone sees the same categories. Keep technical terms and deliberate wording even if Editor suggests changing them.
Choose the correct language for proofreading
Select the relevant text and choose Review > Language > Set Proofing Language. Pick the correct language and ensure Do not check spelling or grammar is not selected. If errors disappear only in one document, also check File > Options > Proofing > Exceptions for in Word for Windows and disable any document-only settings that hide spelling or grammar errors.
Proofreading tips for accurate documents
Run F7 after drafting, but do not rely on automated corrections alone. Review proper names, numbers, formulas, and technical terminology yourself. If the wrong word is already in your dictionary, remove only that entry. You can find more steps in our spell-check not working troubleshooting guide.
Frequently asked questions
Why does Word ignore a correctly spelled but wrong word?
A spelling checker may accept both “form” and “from” because each is a real word. Grammar and contextual suggestions can catch some errors, but they are not guaranteed. Proofread important documents manually.
Does F7 check every part of my document?
F7 starts Word’s proofreading workflow, but text marked “Do not check spelling or grammar,” unsupported languages, and certain embedded objects may not be checked as expected. Review text in tables, captions, and special objects separately when accuracy matters.
Can I use Editor without Microsoft 365?
Many desktop Word editions offer basic spelling and grammar checking, but the Editor interface and advanced style suggestions vary by version, language, and subscription. Look for Review > Spelling & Grammar if Editor is not shown.
Conclusion
To check spelling and grammar in Word, open Editor from the ribbon or press F7. Review each suggestion, confirm the document’s proofing language, and adjust automatic checking only when needed. For persistent failures, use our dedicated troubleshooting checklist rather than repeatedly changing unrelated Word settings.

C P Gupta is a YouTuber and Blogger. He is expert in Microsoft Word, Excel and PowerPoint. His YouTube channel @pickupbrain is very popular and has crossed 9.9 Million Views.