
Quick answer: If Word for Mac does not underline misspelled words, first check whether proofing is disabled for the selected text. Then open Word → Settings (or Preferences) → Spelling & Grammar and enable Check spelling as you type. The menu wording can vary by Word version. These steps help distinguish document-specific proofing exclusions from application-wide spelling settings.
1. Enable spelling checks for the selected text
- Select the text on which you want to turn on the spell check. You can use “Command + A” keyboard shortcut to select the entire document.
- On the Review tab, open Language > Set Proofing Language (the exact menu wording depends on your Word version).
- Uncheck the box “Do not check spelling or grammar” if checked.

- Click OK.

If only part of the document is affected, repeat the language check for that selection. If spelling marks are missing throughout Word, check the application setting next.
2. Turn on automatic spelling checks in Word settings
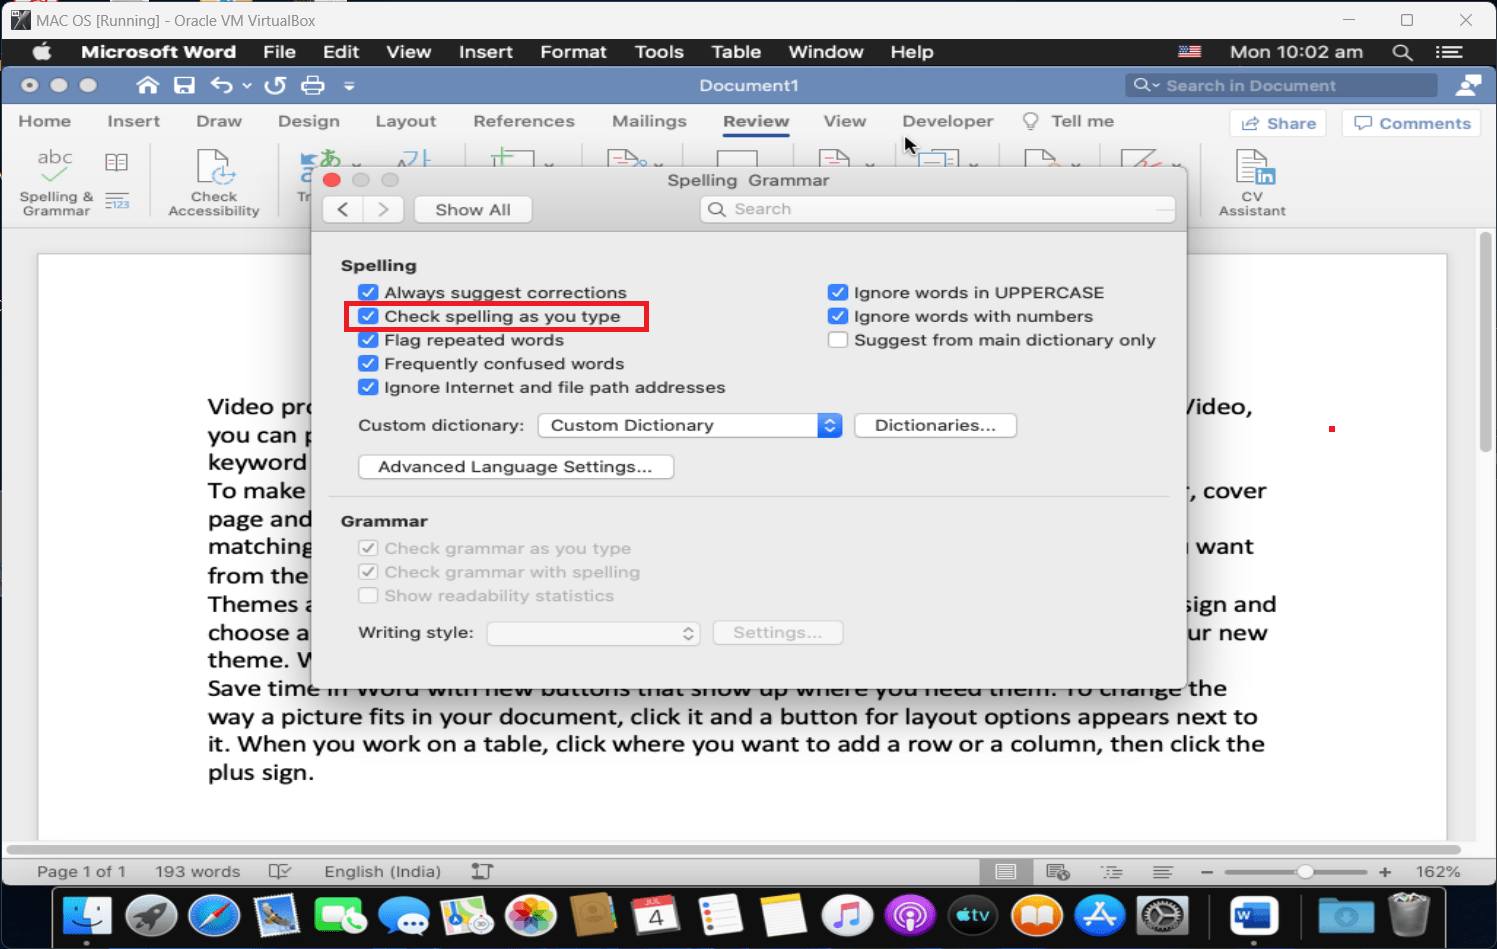
- From the macOS menu bar, choose Word > Settings (called Preferences in older versions).

- Click “Spelling and Grammar”.

- In the Spelling / Grammar window, check the box against “Check spelling as you type”

- Close Settings, type an obvious misspelling such as teh in a new paragraph, and check for a spelling underline. Word may not flag every typo, and suggestions depend on the selected proofing language.


Check the Proofing Language on Mac
If spelling is enabled but correct words are being flagged—or obvious errors are ignored—select the affected text and open Review → Language → Set Proofing Language where available. Choose the language actually used in the passage and ensure Do not check spelling or grammar is cleared. Mixed-language documents may require separate language settings for different passages.
Troubleshooting Word for Mac Spell Check
- Only one paragraph is skipped: Select it and clear the proofing exclusion.
- No red underlines anywhere: Confirm Check spelling as you type is enabled in Word settings.
- Word does not recognize the language: Check the proofing language and available proofing tools.
- Still not working: Test a new blank document with an obvious typo to determine whether the issue belongs to one file or the application.
For additional checks, see spell-check troubleshooting in Word.
Frequently asked questions
Why does Word for Mac skip spelling in pasted text?
Pasted text can carry its own language or proofing exclusions. Select the affected text, choose the correct proofing language, and clear Do not check spelling or grammar. Check a few words before changing the entire document.
Does turning on spelling also enable grammar checking?
Not necessarily. Spelling and grammar options can be configured separately. Review the grammar-related settings in Word > Settings (Preferences) > Spelling & Grammar if grammar suggestions are also missing.
Can I run a manual spelling check instead?
Yes. Open Review > Editor or the spelling and grammar command offered by your version of Word. A manual check is useful when automatic underlines are disabled or difficult to notice.
Quick diagnostic: determine whether the problem is in the document
Open a new blank document, set the proofing language to English, and type mispeling. If Word flags it there but not in the original file, check the original text’s proofing language, exclusions, and pasted formatting. If neither document flags it, revisit the application-wide spelling setting. If only one word is ignored, it may be in a custom dictionary or the language-specific dictionary may accept it. This test checks visible behavior without assuming that red underlines are the only way to run Editor.
Other useful posts you may like

C P Gupta is a YouTuber and Blogger. He is expert in Microsoft Word, Excel and PowerPoint. His YouTube channel @pickupbrain is very popular and has crossed 9.9 Million Views.