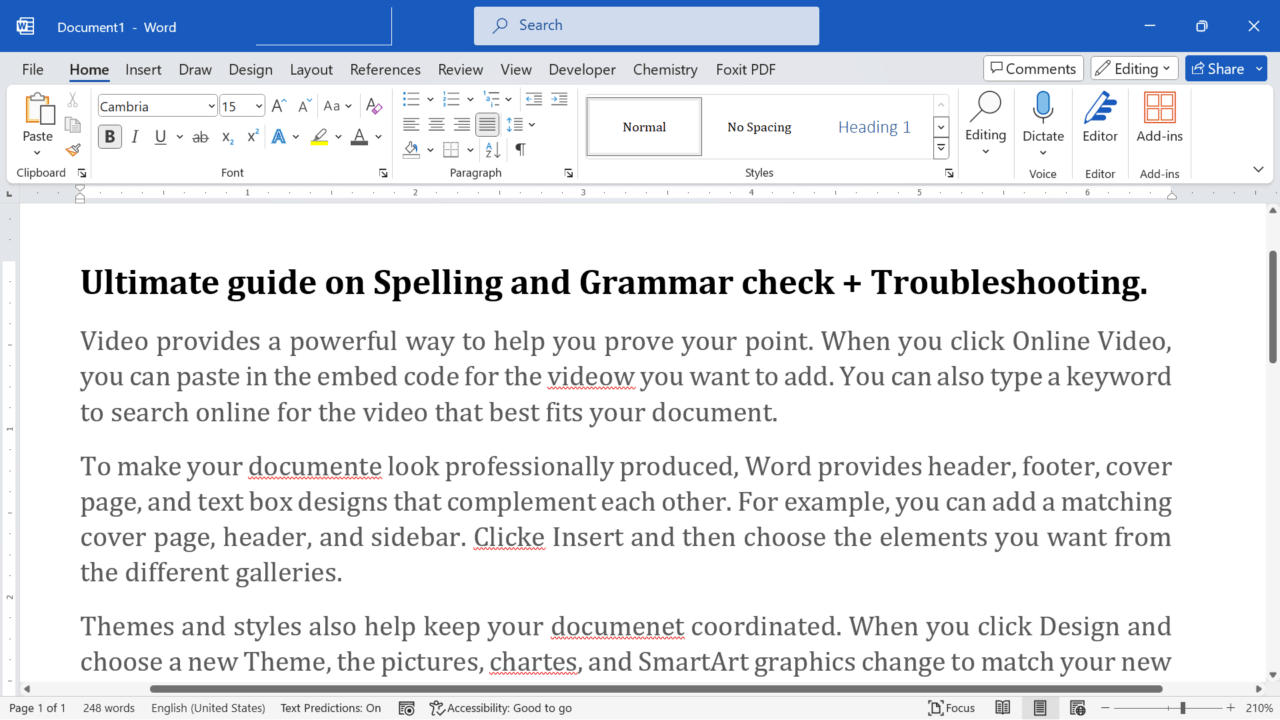
Whether you’re a professional writer, a student, or just someone who frequently uses Microsoft Word, you know the importance of having error-free documents. One of the most essential tools in Word is the spell check feature, which helps you identify and correct spelling mistakes.
Two different ways of seeing spelling and grammar error is as follows:
Trouble Shooting
Spelling and Grammar error Word
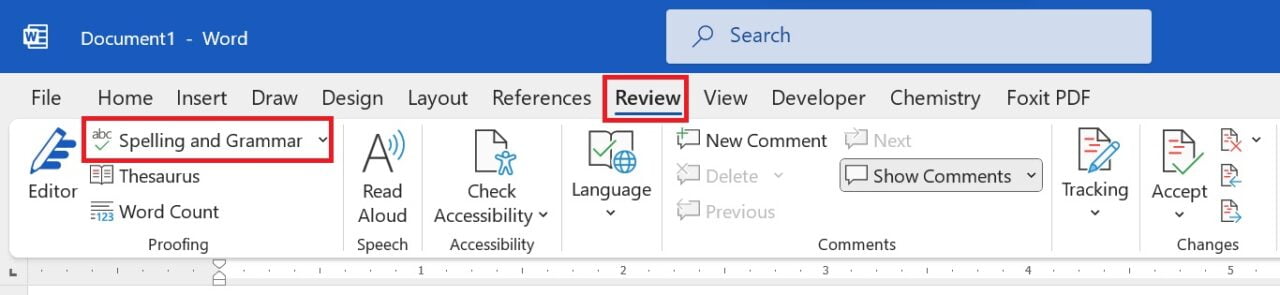
1. Usual Way: Review Tab
Usual method to check spelling and grammar error is by going to Review Tab > Spelling and Grammer
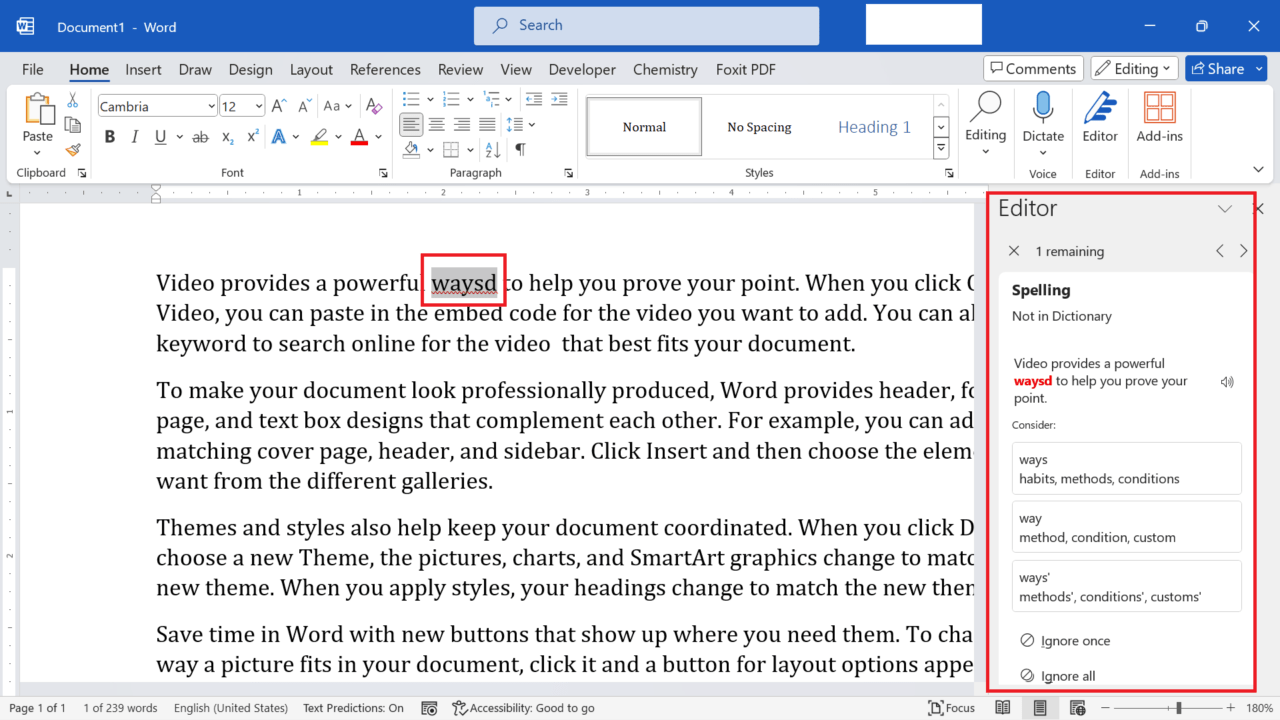
After clicking you will get Editor highlighting spelling mistake and suggestion as follows. Depending on version of Ms Word you are using, options or way you see spelling errors may differ. The following is screen shot of Microsoft Office 365.
2. The Magic Shortcut for spelling and grammar check: F7
Spell check shortcut for Ms Word (Windows & macOS) is F7.
Pressing F7 will displays the Editor task pane to check spelling and grammar in the document or the selected text. Here you can quickly navigate all spelling and grammar errors.
Other shortcut related to spelling and grammar check are as follows:
Finding next spelling and grammar errors: Alt+F7 (Ms Word for Windows) or Option + F7 (Ms Word for MacOS)
Trouble shooting spelling and grammar errors.
1. Some grammar error not showing while other showing.
While the default settings for spell check in MS Word are usually sufficient for most users, you can also customize them according to your preferences. This may be because of following reasons.
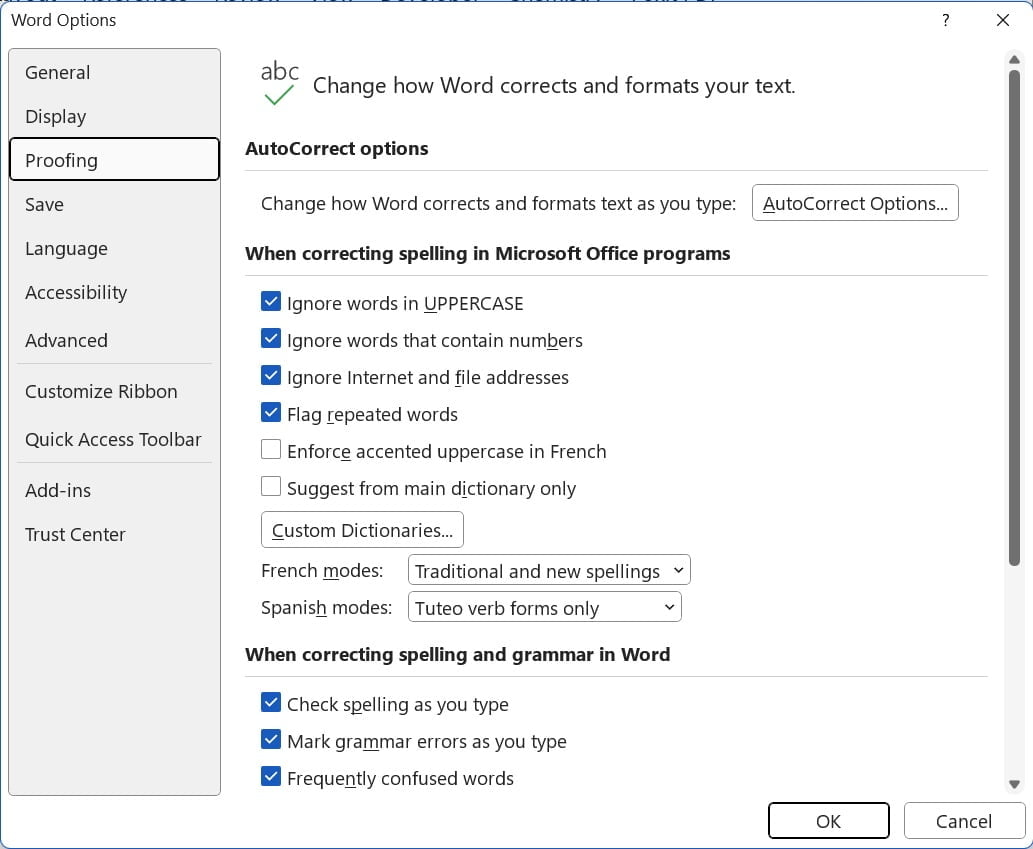
a) Incorrect spelling and grammar settings
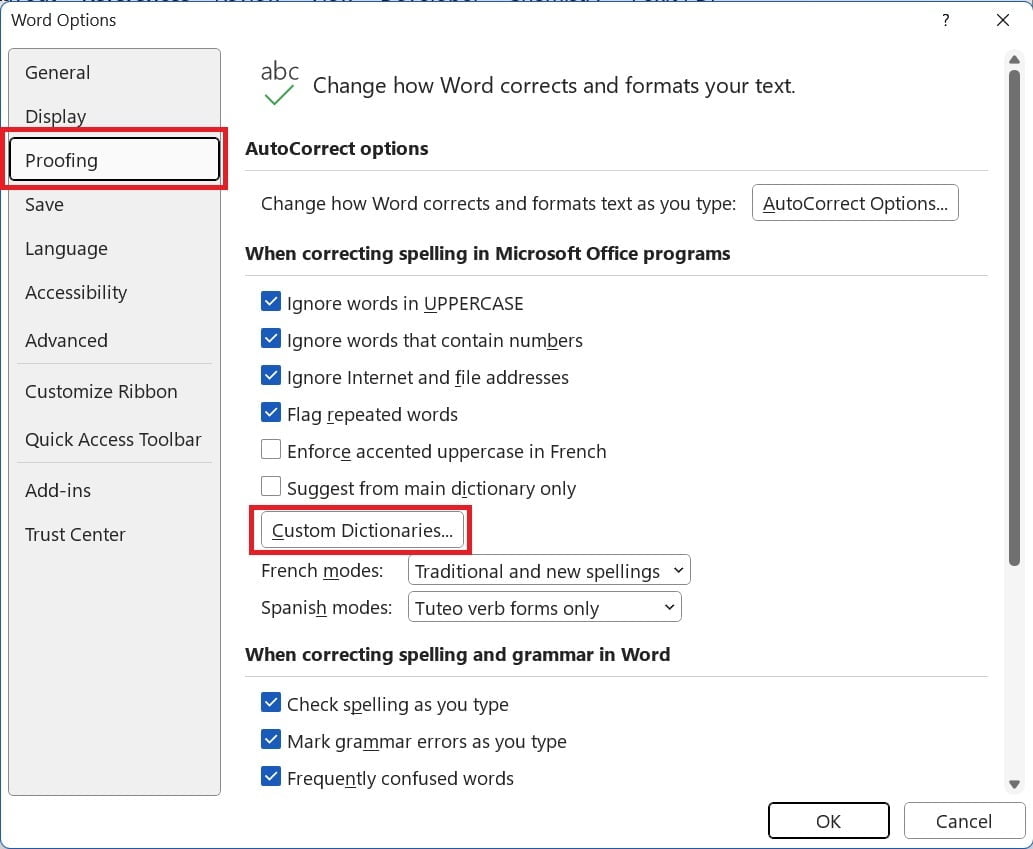
- Go to Files > Options
- In the Word Options dialog box, click “Proofing” in the left-hand sidebar.
- Here, you can customize various aspects of the spell check feature, such as the language, auto-correction options, and grammar checking.
b) Incorrect spelling already saved in dictionary.
When incorrect spellings are stored in dictionary, it may not be flagged as incorrect. You may need to check dictionary for incorrect entry and delete it using the following method.
- Go to Files > Options > Proofing and click Custom Dictionaries
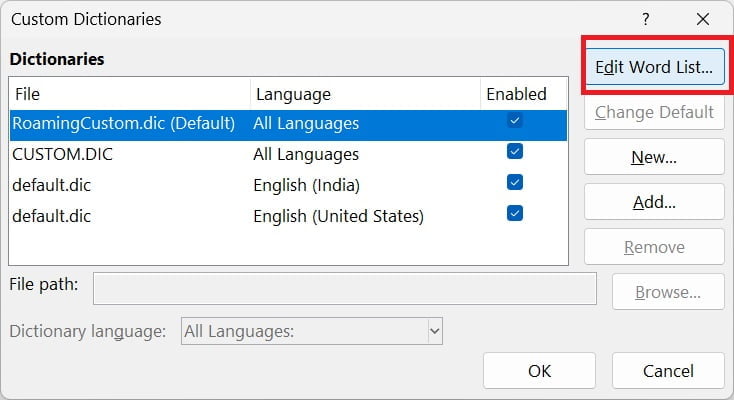
- From the list of open dictionaries, select dictionary and click “Edit Word List“
- Form the word list, select the word (spelling that is incorrect) and click Delete
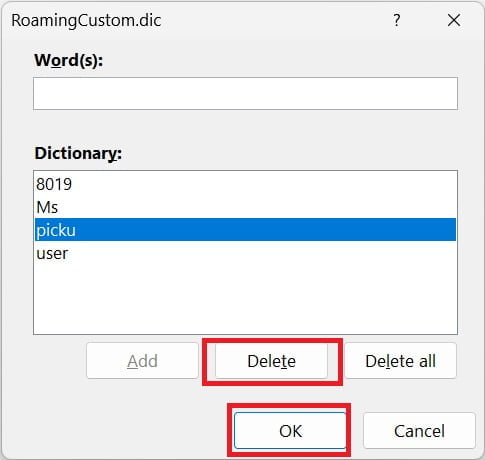
- Click Ok and close all other Windows.
After above steps, the removed incorrect spelling will be shown as incorrect and picked up by Ms Words “spelling and grammar” checker.
Spelling and Grammer check not working at all
Because of the following reasons spelling and grammar may not work at all. All the reasons are covered in detail here.
- Spelling and grammar check turned off: Turn on spelling check.
- Incorrect language selected: Choose the correct language
- Proofing tool not installed: Add proofing tool
- Document specific issue: Create a new document and paste content
For more details on how to correct above error visit our detailed blog on Spelling check doesn’t work in Ms Word
Conclusion
Spelling mistakes can be embarrassing and can negatively impact the credibility of your writing. However, Ms Word provides different ways to check spelling in Ms Word (along with its shortcut) for ways to ensure that your documents are error-free. Also, common trouble shooting to solve spelling and grammar not showing are covered in the here.

C P Gupta is a YouTuber and Blogger. He is expert in Microsoft Word, Excel and PowerPoint. His YouTube channel @pickupbrain is very popular and has crossed 9.9 Million Views.