Separating a section of document with a horizontal line makes it easier to read and visually appealing. Microsoft Word provides few ways to add a horizontal line. This blog covers all these ways along with the hidden trick that allows you add a horizontal line in a flash.
Method 1. Insert horizontal line using Shapes (common method but slow)
To draw a horizontal line follow these steps.
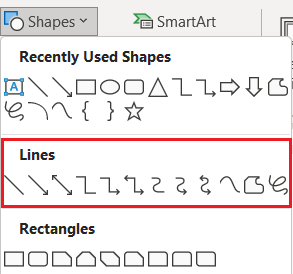
1: Go to Insert Tab > Shapes
2: Under “Lines”, select the type of lines you would like to draw
3. Go to the location where you want to draw line, hold and drag your pointer to draw line and then release mouse button. The key to make perfect horizontal line is holding down shift key while drawing horizontal line.

Method 2: Horizontal lines tool in Borders
This is another fancy way of getting horizontal lines in Word. The steps are:
1. Place the cursor where you need horizontal line
2. In Home Tab, click on “Borders” drop-down (from paragraph group) and select a “Horizontal line“.
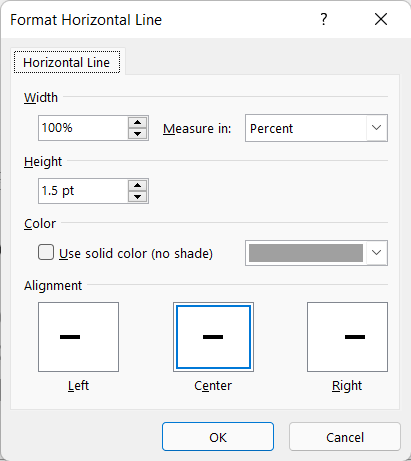
3. To change the format of line, double click it to open “Format Horizontal Line window”. Select the desired options (width, height, colour, alignment etc) and hit ok to apply and close window.
Method 3: Auto format (Quickest way to draw horizontal line)
This is the quickest way to get a full width horizontal line in Word. The only drawback of this method is that line cannot be formatted after drawing.
The method uses Auto Format feature of Ms Word which should be turned on by default. If it is not working, you can turn it on by following these steps.
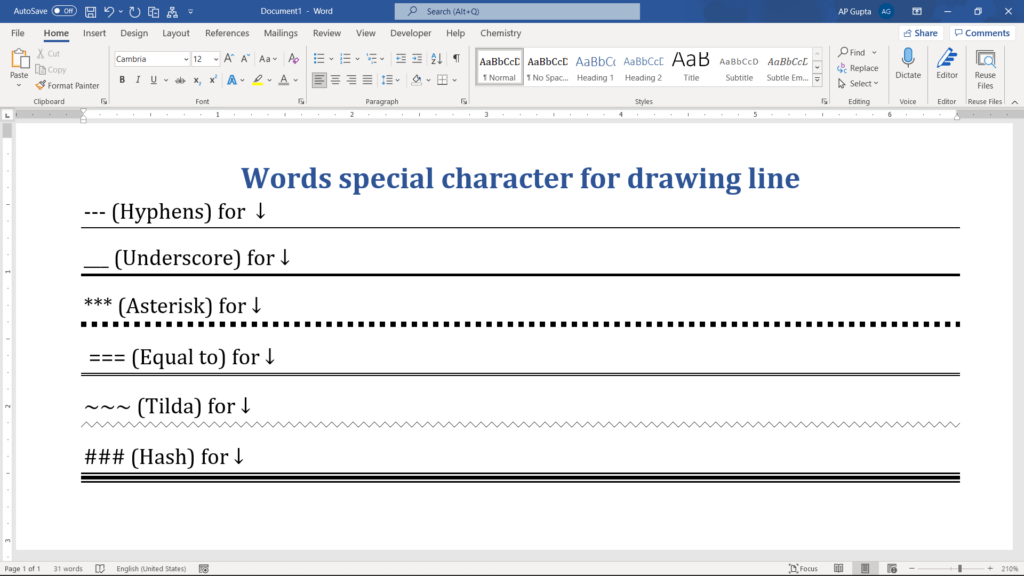
The method works by typing specific character three times at the starting of new line and then hit return/enter to turn these characters into a horizontal line.
To insert line using this method follow these steps
1. Place the cursor where you need full width horizontal line. The cursor must be on its own line to make it work, if it’s not then use Enter key.
2. Type any of the following three characters and hit Enter
Enable Word option to draw line using Auto Format
To enable the above shortcut method,
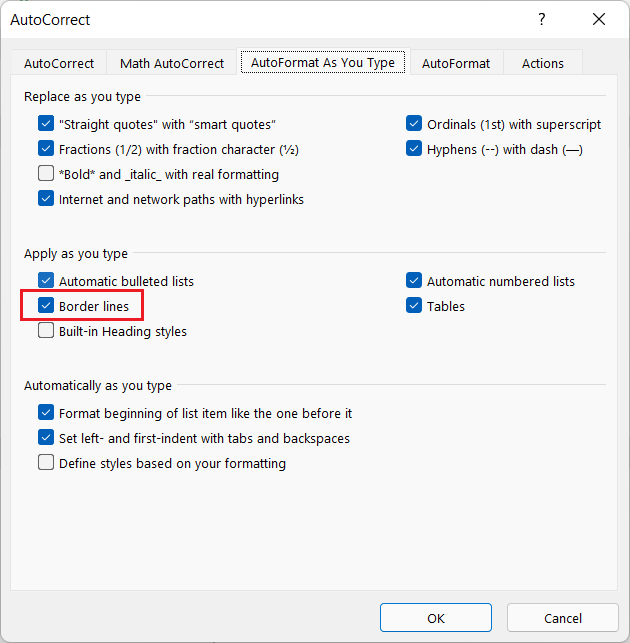
1. Open Auto Correct Options window by navigating Files > Options > Proofing and clicking “AutoCorrect Options”
2. Open “Auto Format As You Type” tab & check “Border Lines”
Related Posts

C P Gupta is a YouTuber and Blogger. He is expert in Microsoft Word, Excel and PowerPoint. His YouTube channel @pickupbrain is very popular and has crossed 9.9 Million Views.