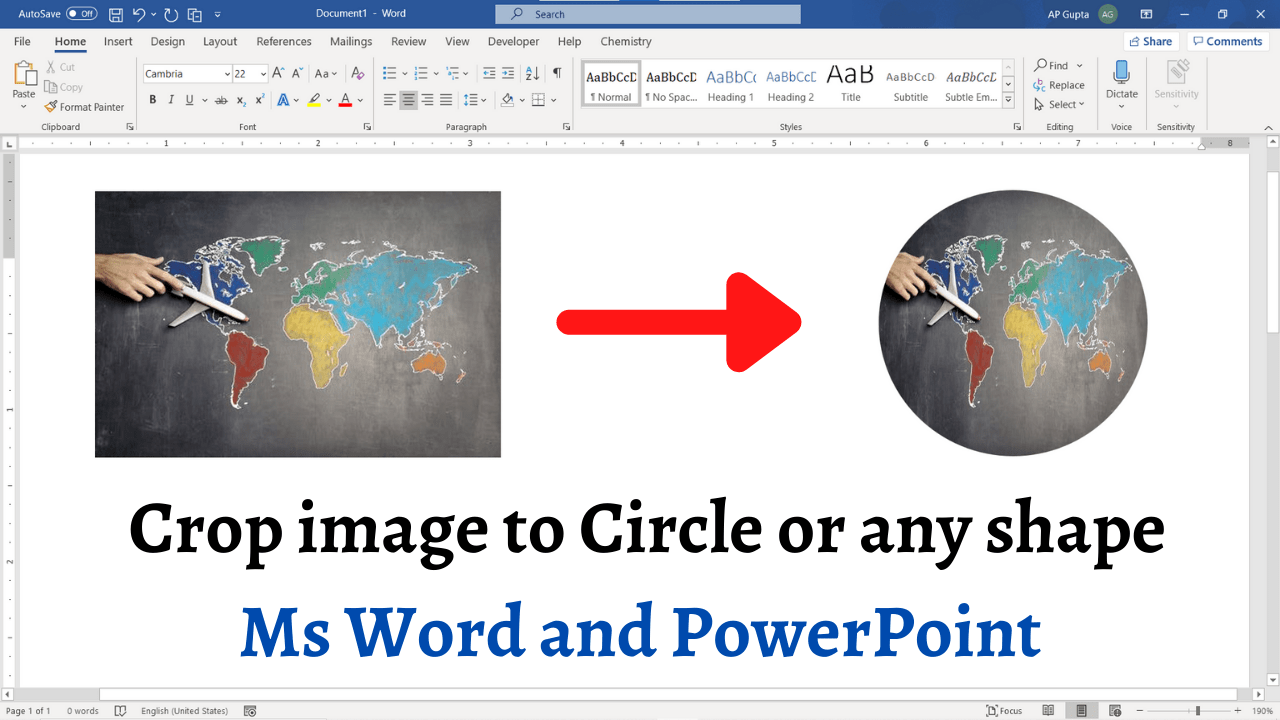
Ms Word and PowerPoint has lot of feature to work on image. One such feature is cropping an image to circle or any custom shape. This blog covers 2 ways by which you can crop picture to circle or any other shape in Ms Word and PowerPoint. The video demonstration is also available here.
1st Method: Draw shape and fill it with picture (Works in all versions of Word & PowerPoint)
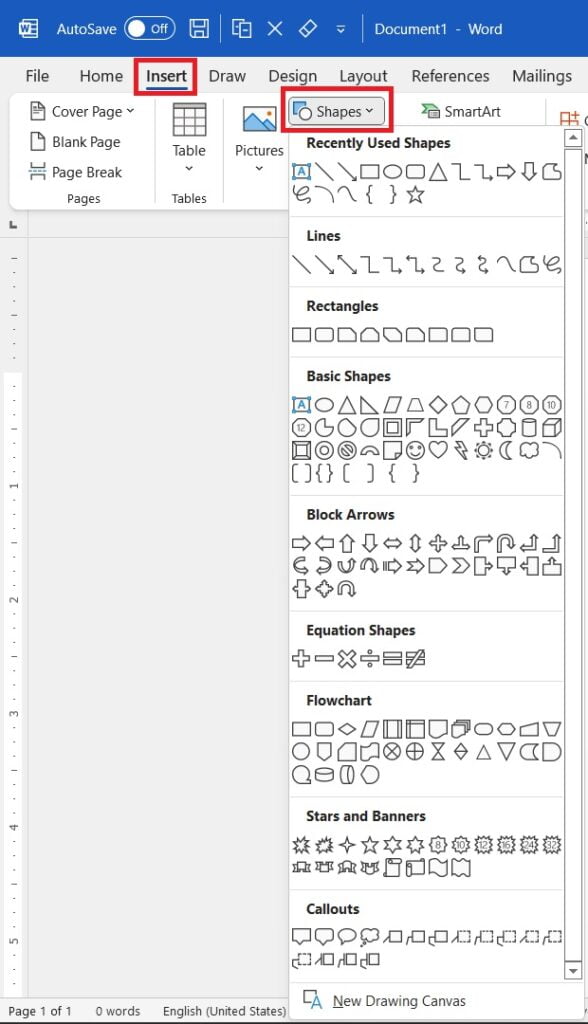
- Go to Insert > Shapes and draw shape into which you want to crop image
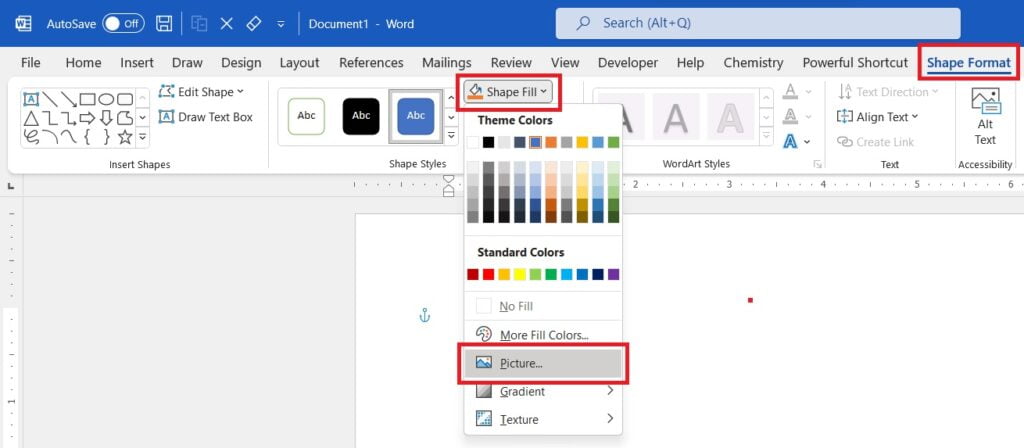
- Click shape and go to Shape Format tab > Shape Fill and select Picture….
- Browse picture/image and then click insert.
For instructions to Zoom in/out or move the image in shape, scroll down or click here to quickly go to the relevant section.
2nd Method: Crop image to shape in 1 click (Works only on newer version of Ms Word & PowerPoint)
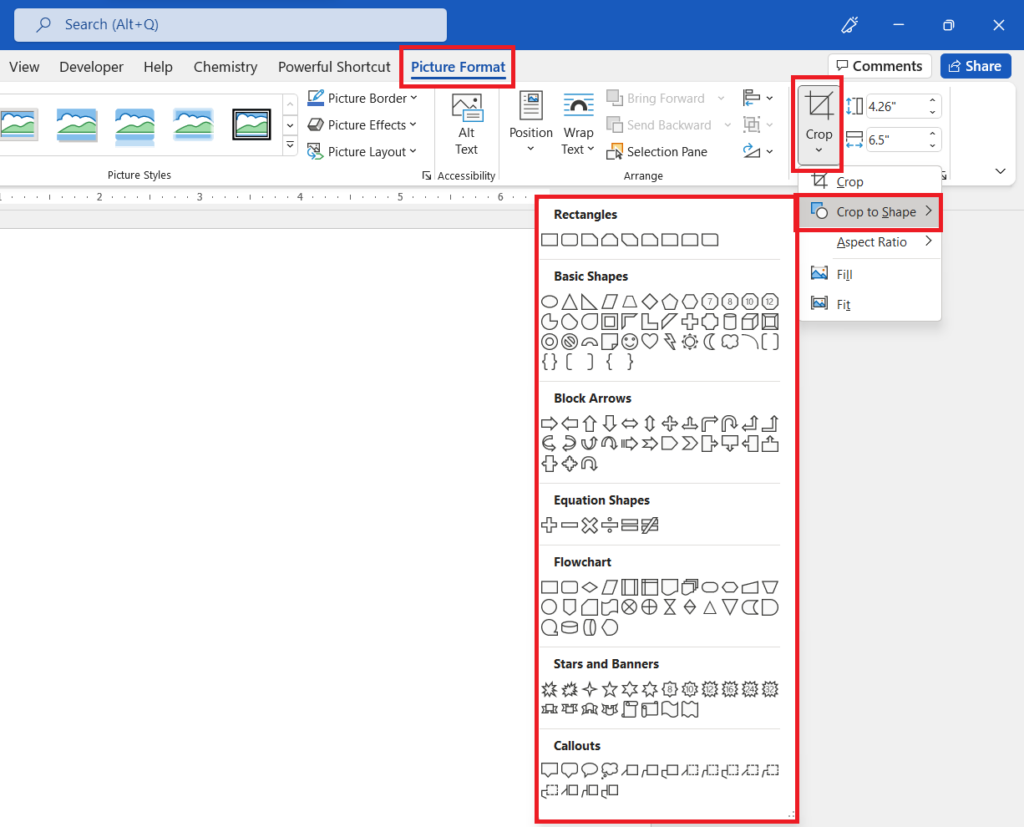
This method allows you to crop image to shape in just 1 click. However, it works only in newer version of Ms Word and PowerPoint. Follow these steps
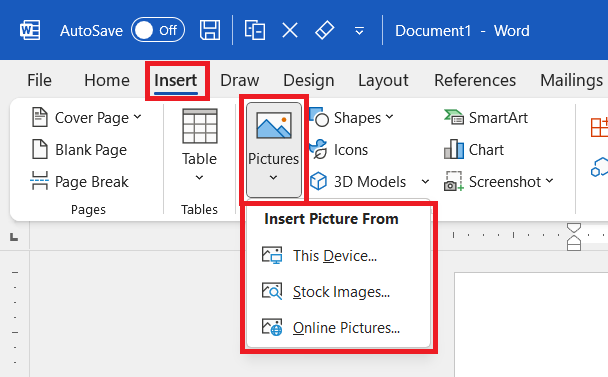
- Go to Insert > Picture and browse the image to insert
- Select image and go to Picture Format > Crop > Crop to Shape and click the desired shape
Following section describes instruction to zoom in/out or position picture inside shape
Zoom in/out or position the image after cropping
To zoom in/out or position the image after cropping, follow these steps
- Select cropped image and go to Picture Format and Click Crop
- Zoom in/out: Use the picture handles at the side or corners to resize.
- Position/Pan: Move image by holding the left button of your mouse to position the desired part of an image in shape
Video on how to crop image to any shape in Ms Word and PowerPoint
Related Posts

C P Gupta is a YouTuber and Blogger. He is expert in Microsoft Word, Excel and PowerPoint. His YouTube channel @pickupbrain is very popular and has crossed 9.9 Million Views.